
If you read Cynthia Tinapple’s blog PolymerClayDaily you will be familiar with the way Cynthia displays the work she shows on her site. The entire background is white. Cynthia does this so the viewer will focus on the art without being distracted by the background. I do the same thing with some of the images I post on my site and elsewhere.
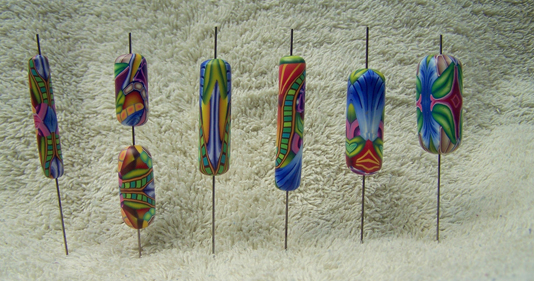
Today I wanted to feature a photo of some beads Jan Montarsi made with his scraps from my Kaleidoscope Pendant Workshop on my Facebook site. I thought the beads were quite amazing and I loved the way he left them on the pins for the photo. However, I felt the beauty of his beads didn’t come across as it should in his flicker photo.
 So… I made some changes in Photoshop. After my changes this is what the photo looked like (both photos are the same height and resolution).
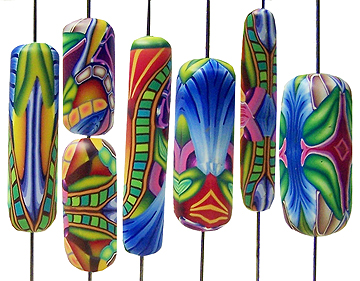 I posted this photo on Facebook just about an hour ago and already it has 46 “likes.” What did I do? … I
- Brightened up the photo using Image > Adjust > Brightness/Contrast.
- Removed the background using the Quick Select tool, then deleting my selection (the carpet).
- Straightened the angled pin by selecting it with the Rectangle Tool then choosing Edit > Free Transform then dragging the curved arrow near the corner of the box to rotate the contents of the box until the pin was parallel to the others.
- Moved each of the pin/bead combinations one at a time until they were all closer together. [I selected each pin/bead combination with the Rectangle Tool then switched to the Arrow Plus tool (the one at the top at the tool box) and used my arrow keys on the keyboard to move each selection where I wanted it.].
- Used the Rectangle Tool to select a smaller portion of the picture (excluding most of the margin surrounding the beads) then used Image > Crop to crop the image.
- Re-sized the image, reducing it by about 50% using Image > Resize and entering the new height I wanted the image to be.
- Used Filter > Sharpen to sharpen the image to counter some of the lost resolution when the picture was downsized.
- Saved the image under a new name.
The fact that this was a very high resolution image to begin with made it possible to do the above manipulations without any obvious artifacts of the process in the final image. I always shoot my photos at the highest resolution the camera permits. I don’t reduce the size of the image file until after all other changes have been made.
The hardest part of this was selecting the carpet in the background in order to delete it. Cynthia Tinapple describes how she does it in her StudioMojo newsletter. You can also find information using Photoshop’s help button. It would have been much easier to have selected a plain cardboard background, though; something to think about when you set up your photo.

UNCLE!! I’ll go get the durn program…..:)
Elements will do it.
Thank you Carol. I have Elements and will follow your steps. As always…you are AMAZING!!!
You are welcome. Enjoy!
Thanks for the tips, Carol. I just received a Wacom drawing tablet and Photoshop for Christmas so every tip is really appreciated! You did a fantastic job editing, but what else would one expect from the most talented, Ms. Simmons? Always in awe!
Let’s not overdo it Cyndi 🙂
Lol, talented and modest…
Most people underestimate how important it is to process their photographs to get the most out of them. Taking a good picture is only part of the process! We are visual people using a visual medium (the internet) to talk about a visual art. Good photography is imperative! Carol, you photographs are always so clear and bright. Thanks for sharing your method. Hopefully people will see how easy it is to get stellar results. (Now if only the mirror had photoshop.)
Thank you Ginger!
This work — is so beautiful – the photos — are really wonderful – And the work is just simply inspiring —
Thanks Carol For making me look so good !!
Thank you for the opportunity.
What a difference – great beads become amazing beads!
True.
You are such a sharing person, Carol. Thank you for taking the time out of your busy schedule to give us *point form* your how-to. I’ve played around with Elements for years but don’t really know all the benefits. I learned a couple of things from you here. Much appreciated.
Glad you found it helpful Barb.