My workshop travel is finally winding down; I hope that means I’ll be finding more time to write this blog. A lot of the posts I write are for the benefit of my students. I try to expand upon (or repeat) information I’ve shared in workshops so the information will be available when their memories of the workshops have faded. From the responses I’m getting it appears that a lot of other people are finding the information useful as well. I’ll try to do better at keeping it up.
 For those of you who don’t know, “caning” refers to the process of constructing a polymer clay cane. It has nothing to do with preserving fruit. People often ask why I recommend certain tools for my caning workshops; here are some of the reasons.
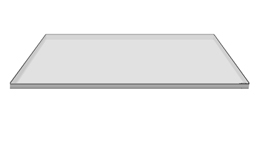
I prefer to use a glass work surface because it is transparent and it is more resistant to scratches than plastic. I also like the weight.
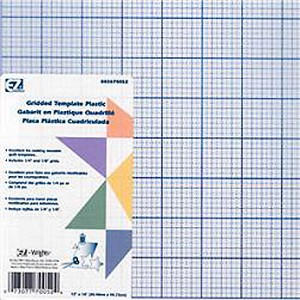
I place a plastic quilting grid under the glass to facilitate measuring and lining up pieces of clay. The grid has 1″, 1/4″ and 1/8″ divisions.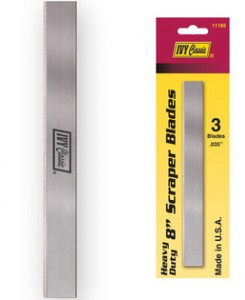
In addition to the usual slicing blade I carry an 8″ floor scraper blade. I use this blade for scraping/lifting larger sheets of clay off the work surface if my regular blades aren’t long enough. It works best when the sheet is lifted using a swift, continuous pull of the blade. Look for the blades in your home building supply store. There are many brands. The blades come packaged individually or in multiples.
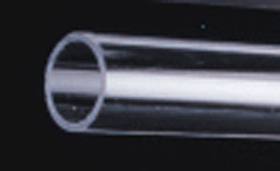
I have an acrylic roller that measures about 12″ long by 2″ in diameter. I find that much narrower rollers are more likely to leave indentations in the clay. This larger roller is particularly useful for reducing a rectangular cane. Rolling over the top of the cane helps even up the surface and square up the corners in addition to elongating the cane. Roll over one side of the cane , then flip the cane 1/4 turn to roll over the next side.
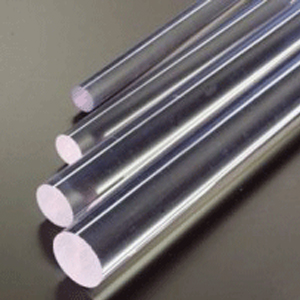 I also have a set of narrower rollers that I use to shape portions of a complex cane during construction. It is easier to insert a new component cane if the “receiving” area of the master cane has already been shaped to “accept” the component cane. I use my acrylic rollers and rectangles to do this shaping. The rollers are in matching pairs and range in diameter from about 1/4″ to 1″.
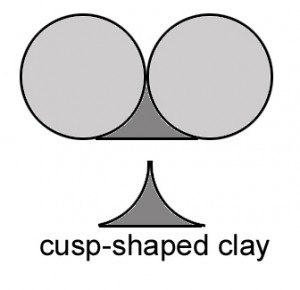
Used in pairs, the rollers are perfect for forming “cusp-shaped” units of clay to fill in the gaps between cylindrical components. The filling keeps the round components from turning into square components when the master cane is reduced.
![]() When it is necessary to join the edges of two sheets of clay together (as when preparing clay for a Skinner blend), I place a deli sheet over the position of the seam and burnish (rub) the surface of the sheet gently with a bone folder (above) or the back of a spoon to close the seam. I do this every time I start a Skinner blend to make sure the pieces won’t split apart when the sheet is folded and fed into the pasta machine.
When it is necessary to join the edges of two sheets of clay together (as when preparing clay for a Skinner blend), I place a deli sheet over the position of the seam and burnish (rub) the surface of the sheet gently with a bone folder (above) or the back of a spoon to close the seam. I do this every time I start a Skinner blend to make sure the pieces won’t split apart when the sheet is folded and fed into the pasta machine.
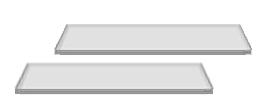 I find a pair of acrylic rectangles extremely useful for squaring up square canes and helping to shape triangular ones. I place them on opposite sides of the cane and press. The plastic should be thick enough that it doesn’t bow when you press against it. I have my basic set that I use most often, two rectangles approximately 3″ x 12″ x 1/4″, as well as some larger ones for working on larger canes. A single rectangle can be used to elongate and even out cylinders of clay (“snakes”) by rolling the cylinder of clay back and forth under the rectangle while pressing gently on the rectangle. Press too hard and the cylinder can come apart in the center and “deflate” like a flat tire.
A steel potter’s rib is nearly irreplaceable when it comes to lifting up very thin sheets of clay without tearing them. I store my sliced canes between sheet protectors and sometimes these very thin slices are quite difficult to remove, especially when they have been stored for some time. A steel potters rib will often do the trick. Get the kind that is flat and has one straight edge.



Thank you so much for sharing your expertise! thisis an awesome post!
Why thank you Kati. I’m glad you found it useful.
Never have I learned so much in such a short article! Thank you for sharing.
Thank you, Elizabeth!
Even though I took your class, I just learned your trick of using the quilting grid. Great idea for my work table where I have a large piece of glass to protect the table surface! I believe I still have one from my quilting days–I’ll go look for it right now!
You’ll love it!
Great tips! What’s even more exciting (to me anyway) is that I already have a lot of those tools! I also have a large acrylic roller like yours, but it has a bunch of cracks throughout the roller. I’m afraid to use it in case it shatters. Do you know where I can get these? Should I be looking in Home Depot? Thanks again!
If there is a plastics supplies company in your town, they probably have them.
Polymer Clay Express has the acrylic rollers (the large hollow ones) for sale online at a reasonable price
As always another great post. Cant wait for next year when we have the class at Maureen’s again! Good luck with your upcoming classes.
Thanks Julie!
Thank you so much for this informative post! I’ve been sculpting in polymer clay for along time, but caning has always seemed a bit intimidating to me. I love your tip on making cusp shaped clay to fill the gaps between round pieces of the cane- I always had problems with that!
You’re welcome, Michelle.
Thanks for all the great info re pc. Fell in love with it back in 70s I think it was and then had to put it aside for for more non=fun things like family, work etc.had periods thru the years but not able to sustain. Now, finally, back again so have a lot of catching up to do so your posts most helpful.
I’m glad people are finding it helpful. Thanks for letting me know.
As always, Carol, your posts are detailed and instructive. Thanks for being impelled to share your knowledge and keep those cards and letters coming.
Nancy
Thank you for the feedback Nancy. It’s nice to know the effort is appreciated.
This is great–the illustrations are particularly helpful. I confess I had never thought of using two rollers to produce the cusp effect on a component–devil’s in the details, isn’t it?
Thanks for commenting, Randee. Yes… the details.
so excited to find you, your work and website. I live in western CO. Are you planning any workshops in Colorado? I have wanted to do better canes and I can not believe how beautiful your colors are. I hope to be in one of your workshops. Keep on caning!!!!!
I’m not doing workshops in CO this year but probably will next year. Thank you so much for the compliments.
are you writing a book? Your methods are so unique, detailed and beautiful. I would love to be able to sit down with a wonderful, colorful book book by you.
I’m afraid a book is 2-3 years down the road, but thank you!
Wow, you are a very precise artist. I admire that, and I’ve even tried it once or twice, but I always have to give it up because it’s not me. I’m more of an “eye-baller”. I’ve been making canes for 15 years and when I started, all I had was a book and some clay. All the rest was taken from the kitchen and my head. I used those first humble tools for so many years, that when I finally realized there was now a cornucopia of tools, I found almost no use for them. Now I use floor tiles for my work surface, acrylic rollers, Atlas pasta machine, slicer and paper clips (for punching holes). I cover my canes in aluminum foil when not in use and I only use the new Kato clay (in the summer if possible because it is so soft, I hardly have to do do a thing to it!).
I love your kaleidoscope designs. I am going to try my hand at that this summer. It’s so fascinating. Yours are the the best I’ve seen. God bless you!
Thanks for the compliment, Sarah. I think a lot of polymer clayers are tool freaks and enjoy collecting new tools almos as much as working with clay. Congratulations on keeping things simple.
Carol:
Like so many my life does get in the way of my time to do this wonderful art. I took your
class at the last Synergy and I didn’t want it to end. I just wish you would have one in
New Orleans or Baton Rouge for like at least a week. To me just watching you create is
like watching or reading a “fabulous fairy tale”.
Love you and your work
Thank you for the wonderful compliments, Carolyn. I am in the process of deciding whether I’ll offer my 6-day kaleidoscope pendant intensive next year and if so, where it/they will be. My next workshop in your region will be a 2-day Mokume Gane workshop for the Missippi Polymer Clay Guild in Fredricksburg, MS the weekend before Synergy in March.
Your method with two rollers for that awkward little cusp shape is going to come in very handy, Carol! Thank you for so many helpful tips and tricks!