
Part I: Correcting Color Washout
(Note: I’ve been on a teaching tour in Europe for more than two months and have recently returned. While traveling I posted information about the tour on my Facebook page rather than here. If you would like to catch up on my travels including the workshops I taught and sightseeing I did, I invite you to check out my Facebook page https://www.facebook.com/CLSDesigns. Lots of my students’ work is also shown.)
Yesterday Αριέτα Σταυρίδου posted the image below on Facebook to illustrate the necklace she had made from her cane from the Greek workshop. The photo reminded me that I started to share some information about photographing polymer on black quite some time ago.
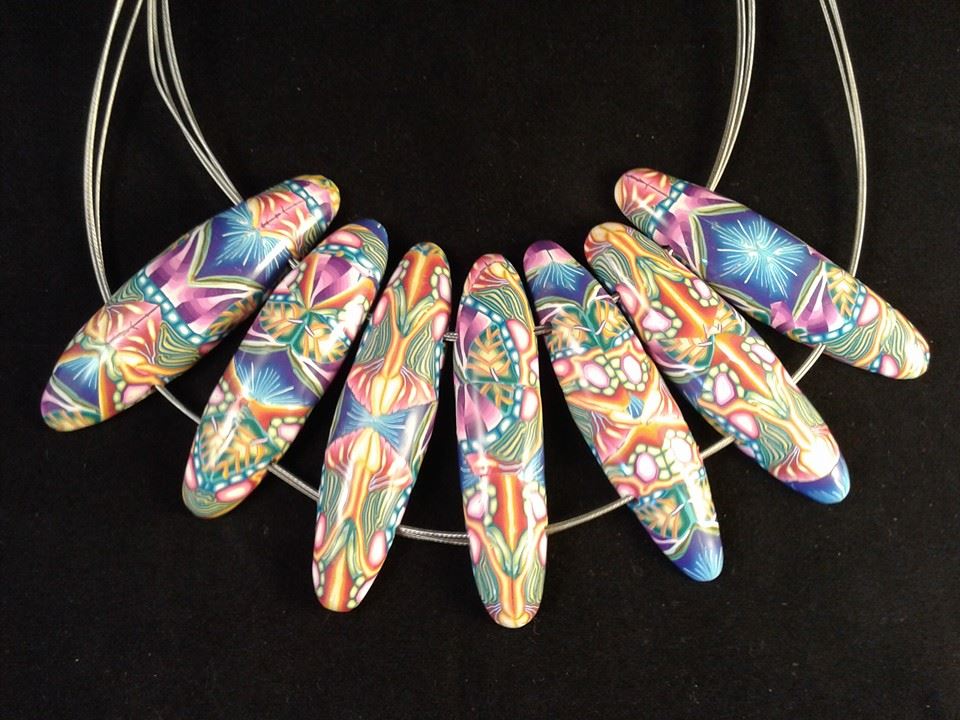
This image doesn’t do the necklace justice because the colors are washed out. The reason is that the camera overexposes the necklace in order to balance the lights and darks in the image. This is easily corrected in Photoshop or Photoshop Elements. Open the picture in Photoshop. From the menu at the top of the screen, choose “Image.” A drop-down menu will appear. Choose “autocolor” and press the return key. This will help correct the hues. Next choose “Image” >> “Adjustments” >> “Levels” and press the return key.
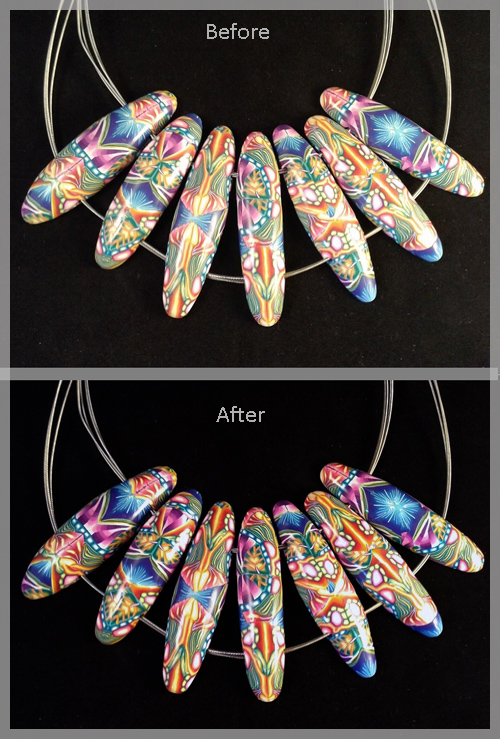
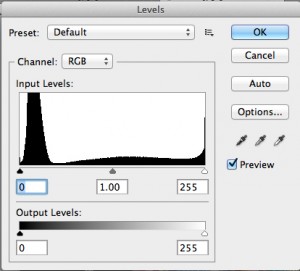 A levels adjustment window will appear. All you have to do then is use your mouse to drag the central triangle (labelled 1.00) to the right until the necklace no longer looks washed out and click “ok.” This will readjust the light/dark balance it the picture and remove the washed out appearance, as shown in the “before” and “after” pictures below.
For a more complete explanation and a video demonstration see Photoshop Help: Levels adjustment.
