
I promised some more information about my necklace collaboration with Rebecca Watkins and here it is. It will be short, though, because I’m in the midst of packing to leave for my Hidden Jewels Mokume workshop in Kansas City this weekend.
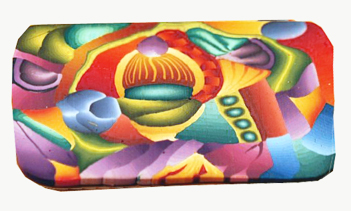
Rebecca and I decided that I would make the cane to provide the color in the beads and Rebecca would provide hollow bead forms. The first cane I gave Rebecca was too detailed; the lines she carved did not show up as well as she would have liked. I made a second cane that consisted primarily of Skinner blended shapes with very little detail. Here it is:
 I already had the blends prepared for a project I was planning so I was able to assemble the cane fairly quickly. (For that project I wanted to see if I could create designs evoking painted silk.) I gave Rebecca slices of the cane as well as short pieces of the component canes. She mostly used slices of the component canes while I used slices of the full cane. Here is Rebecca’s work area with some of the patterns she made for the hollow paper forms. Towards the top of the picture you can see some of the completed forms covered with a thin layer of black clay:
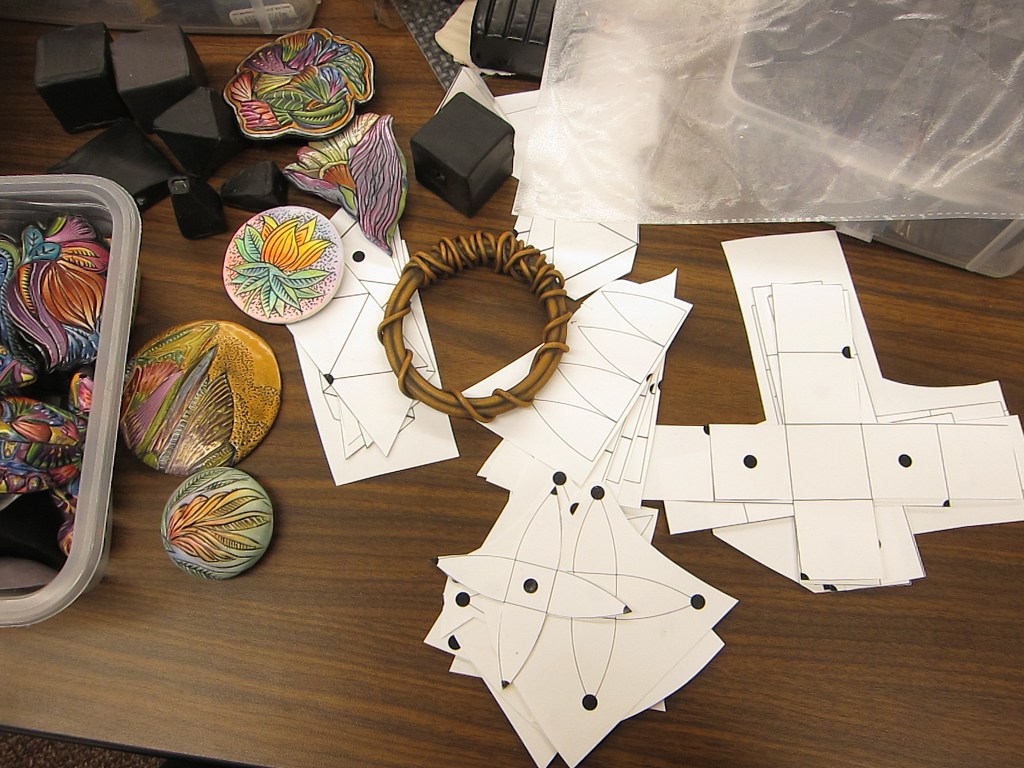
The carved pieces towards the left side of the picture are test pieces she made with my first (too detailed) cane.
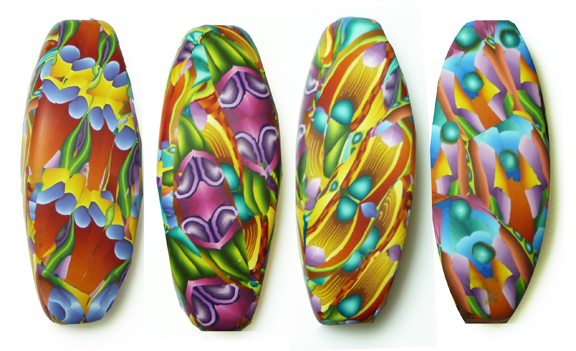
I started with the paper forms Rebecca had covered with a very thin layer of black clay and baked. I added another layer of clay in an effort to smooth out the shapes and strengthen the forms. Even with the additional clay, however, the forms remained charmingly lopsided. If symmetrical forms were needed one could bake and the sand the clay-covered forms before adding the veneer, but I applied the veneers on top of the raw clay. I made the veneers by cutting and recombining sections of the cane slices on my work surface before applying them to the beads. Here are the four sides of the first bead I veneered.
These results were close enough to the painted-silk look I wanted for my next project that I’ll continue to experiment with this approach. Rebecca’s beads were all carved and looked very different from mine; you can see them on her blog and learn how to make them in Cynthia Tinapple’s book Polymer Clay Global Perspectives: Emerging Ideas and Techniques from 125 International Artists. (You can probably pick them out in my previous post as well.)
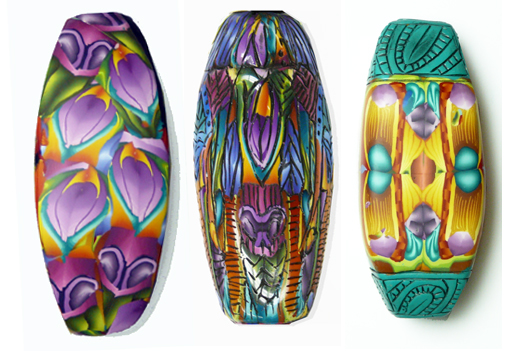
I made several more beads and even carved some of them. I was particularly happy with the bead that is carved on the turquoise end caps and flat in the middle. After they were baked I sanded the flat parts to a satin finish and buffed the carved sections.
Rebecca darkens the carved indentations with a special powder she describes in her blog. I tried paint as well and was quite happy with the results. If you want to try Rebecca’s patterns you can download them from her blog. I did a bit of investigating as well and found a site with over 100 patterns for paper polyhedra created by Gijs Korthals Altes (as a hobby, no less). Check it out. (Click on any 3-D form to see the pattern.)
I’m back to packing for now, but I can’t wait to return home and continue with this project. Eventually, it will become a class I’ll teach in the fall of 2014.

Pingback: Collaboration