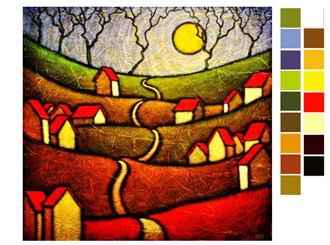
UPDATE: One of my readers, Anna Anpilogova, sent in these links to palette generators. The are in the comments below but I’m repeating them here because they are so useful. Thank you Anna! http://www.colourlovers.com/photocopa, http://kuler.adobe.com/#create/fromanimage, http://www.colorhunter.com, http://bighugelabs.com/colors.php, http://www.palettefx.com/, http://jrm.cc/color-palette-generator/
Also the artist for this picture is G C Meyers
********************
This post fulfills a promise to some of my students. They were very interested in learning how to make color swatches in Photoshop but I didn’t have time to show them during my workshops. I suspect others might be interested as well because if you have even a cursory knowledge of Photoshop (or Photoshop Elements) you can make color swatches to match a picture with very little effort. Here’s how…
Start Photoshop, then open up the file you want to work with by choosing File -> Open ->’Your File Name’ the top of the Photoshop screen (fig 1a). Your file will open in your Photoshop workspace (1b). The first thing you will have to do is create some white space to hold your swatches. You can do this by selecting Image -> Canvas Size at the top of the screen (1c).
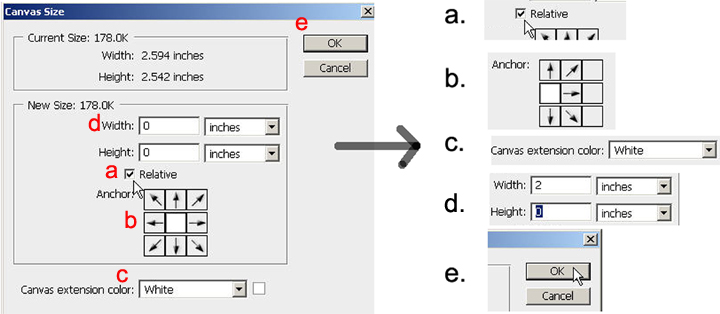
This action will open a “Canvas Size” window. You are going to increase the canvas size for your picture so that there will be some white space around your image. There are 5 things you have to do. First, use your mouse to put a check in the box next to the word “Relative” (2a). This will enable you to specify how much space you want added rather than having to calculate what the final size will be. Next, use the 9-square “map” just below the check box to tell Photoshop where you want the white space to be added (2b.) If you want the canvas to be spread evenly around the outside of the image choose the center square as the place where the image will be “anchored.” I would like my white space to be only on the right side, so I move the anchor one space to the left (2b). Be sure to choose what color you want the canvas to be (2c). Next, specify how much canvas you want added. In this case I want 2 inches added to the right so I put “2” in the width and leave the height at “0” (2d). Finally, click “OK.”
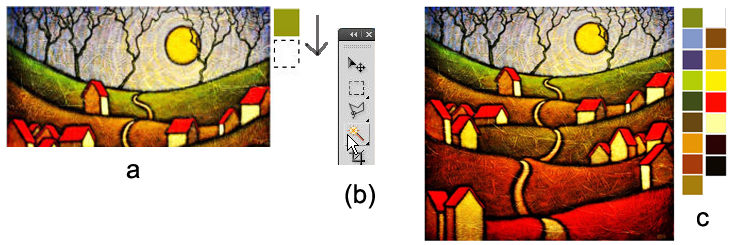
The white space will appear in the specified location. Draw a box where you want your first color swatch to appear by selecting the rectangular marquee tool on the Photoshop tool bar (3a), placing your mouse where you want the box to begin, and clicking and dragging the mouse to select a rectangular area (3b). Now go back to the tool bar and select the eyedropper tool (3c). The mouse cursor will become an eyedropper.
Place the eyedropper over the image at the point where you want to take your sample (4a). Click the mouse button to take the sample. The color of the sample will appear in the color swatch box at the very bottom of the tool bar. (You may need to move the mouse around a bit and take several test samples before you get a sample that matches the color you observe in the sample area. This is an artifact of the eyedropper’s sampling area, something I won’t elaborate on here.) Next click the paint bucket tool on the tool bar (4b). The mouse cursor becomes a paint bucket. Place the spout of the paint bucket in the rectangle you selected for your swatch, click the mouse button and the paint will fill the selection area (4c).
The swatch area will still be selected. (It will have moving dashes around it.) Just press the down arrow on your computer to move the outline to a new location (5a). Switch to the paintbrush tool and take the next sample. Continue until your swatches represent all the areas you want to sample (5c). If your swatch outline disappears, you can reselect any swatch with the magic wand tool (5b), switch to the rectangular marquee tool and use your arrow keys to to move the outline to a new location.
If you try this I think you’ll be surprised to see how different colors look once you move them away from their neighbors! BE SURE TO SAVE YOUR WORK PERIODICALLY.


Carol,
What a clever devise. I often look at the colours in fabrics and artworks and wonder how to replicate them. This takes the guess work out of the equation. You can hone in on the colours rather than being sidetracked by the overall pattern or subject matter. I have an older version of Photoshop Elements but was able to extract the colours easily from what I was looking at. A very nice tool to use. Thank you for sharing.
Jenny,
Thanks for writing. It is good to hear from someone who was able to follow my instructions successfully. Have a happy new year!
Carol, thank you so much for sharing this technique. I will give it a try!
You are welcome, Barb. I think you’ll like it.
Carol
I just tried this out on a gorgeous beach photo from a trip to Hawaii…. it worked like a charm! I use Elements (just upgraded to 10) and it was easy as pie….. Thank you for sharing this…. now I just need to learn to properly calibrate my monitor so the colors look the same when printed….
Thanks for letting me know about your results, Lynn. I’m glad you liked it.
Carol
Thank you for this great tip. I look forward to giving this a try.
Some websites also provide palette-generators. Here are some examples
http://www.colourlovers.com/photocopa
http://kuler.adobe.com/#create/fromanimage
http://www.colorhunter.com
http://bighugelabs.com/colors.php
http://www.palettefx.com/
http://jrm.cc/color-palette-generator/
Thank you Anna. I knew there were others but not where. This is a good list!