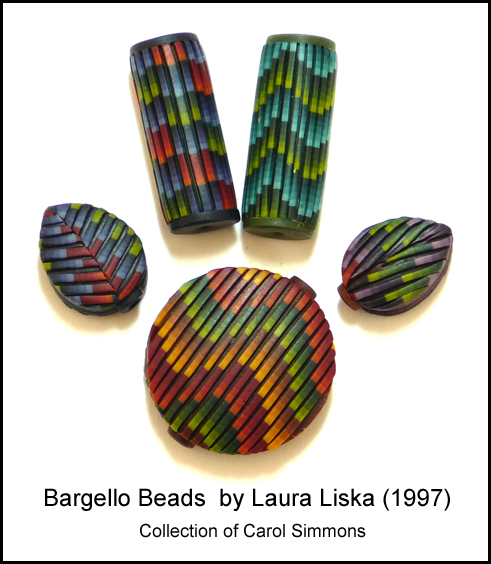
 Among the most prized pieces in my polymer collection are these bargello beads made by Laura Liska. I love the desaturated color blends and the rich texture she created by leaving gaps between the raised strips of color. I wanted to buy them all but my funds were limited so these are all I have.
Several years later, after Laura had stopped working in polymer, I tried to make my own. I wasn’t able to recreate the richness of her color blends nor was I able to manipulate those tiny strips of color (the round bead is just over 1 inch across and there are 15 tiny strips on it) without distorting them. Achieving Laura’s even spacing between the strips was way beyond my abilities (and probably still is) so I gave up.
Lindly Haunani and Maggie Maggio have done us all a great service by providing instructions for making these beads (with Laura’s permission) as a project in their 2009 book Polymer Clay Color Inspirations. Especially useful is the information on how to use “mud” to produce beautifully shaded color blends.
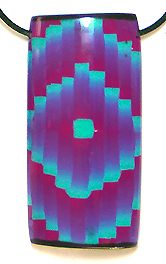
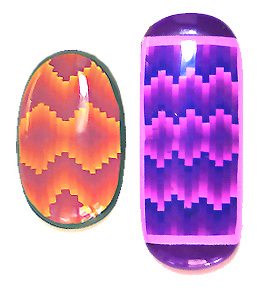
 I returned to working with bargello designs when I started casting about for things I could do with Skinner Blends I already had on hand. This time, after I stacked my blends I sliced the stack into very thin sheets and then into narrow strips . (Yes, I used my slicer.) I arranged these strips like fabric to create flat bargello patterned veneers to put on pre-formed pendant blanks.
The pendant on the left was my first effort. It is a bit clunky looking but it clearly has a bargello pattern. After that moderate success I decided to tackle a more complex pattern with thinner strips.  My next two efforts are shown on the right Each pendant is a bit over 1 inch wide..
This is how I made the veneers. I started with a glass surface with a grid underneath it to help me line up the strips. Beneath the grid there was a sheet of white cardstock and beneath that four small blocks of blue ice to keep the work surface cool in my overly warm house.
Next, I laid out the cut strips on my glass work surface. Using a tissue blade (lengthwise) I lifted up one slice and placed it in a different area of my work surface, making sure it was very straight, lined up parallel to the grid and pressed down on the glass. I used my blade to pick up the next strip. (When I picked up the strip, I didn’t slide my blade entirely under the strip; instead I tilted my blade such that I was able to lift the strip by its edge with most of the width hanging off of the blade.) I lined up this strip (still on my blade) with the one on the glass, offsetting the pattern just a bit. When the strip was in position, I tilted the blade so that the free edge of the strip was pressed against the edge of the strip on the glass, then released the strip with a rolling motion of the blade. The strip came off in the desired position but wasn’t quite straight so I pressed my blade against it to straighten it before adding the next strip.
 After I assembled the strips for the veneer, I placed a sheet of waxed paper on top of it and rubbed over it with the back of a spoon to fuse the strips. I trimmed the edges then lifted the veneer with my blade and transferred it to a small piece of cardstock. I slid the veneer off the edge of the card onto the pre-formed (unfired) pendant blank, taking care not to trap any air bubbles. I burnished the veneer onto the blank and completed the pendant.
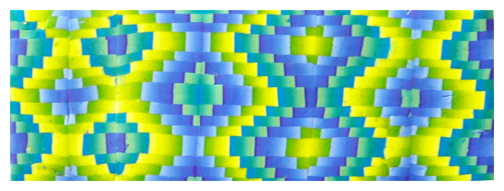
The picture above is a veneer in progress on my work surface. It is about 1 inch high. When I am constructing my veneers I try to offset each new strip from the one before it by an amount equal to the width of a strip. The zigzag patterns are created by offsetting the strips to the right for several strips then off setting the next ones to the left.
I will be teaching the simplest version of a bargello pattern as part of my Introduction to Color Blending workshop at Shake Rag Alley School of Arts and Crafts, in Mineral Point Wisconsin on June 2, 2012.


j’ adore ce que tu fais
bises de France,
si tu pouvais mettre un traducteur sur ton blog cela m’aiderait un peu
merci
Oui, je vais essayer de le faire.
(Laughing) they are gorgeous, but I think I would run screaming from the room—such precision placement is far beyond me. Odd for someone who used to set diamonds, isn’t it?
A bit 🙂
Carol,
As always, your work just blows me away with the beautiful colors and the precision. If I had just a smidge of your patience…I could do it…I think I could do it…I KNOW I could do it…
laurie
That’s funny Laurie, I don’t think of myself as a patient person just an obsessed one. Hugs.
OMG Carol, these are gorgeous!! when I read the post , it made me smile, you have described the whole process with a precision of a surgeon performing a surgery. You have a very steady hand and lots of patience 🙂
It in nice to hear from you, Shirali (what a pretty name). I’m glad you found my description understandable. In all truth, I don’t have a steady hand, I’ve figured out how to brace it to keep it relatively steady while manipulating the slices.