
Note: My site is currently undergoing a facelift. It is not quite finished and I apologize for any broken links or other problems that might appear in the interim.
This fall I was contacted by Polyform to see if I would agree to be the featured artist on the cover of their 2013 Sculpey catalog. Of course I would! I asked what they wanted for the cover and they replied “cane slices.” At that point I had just returned from Europe and didn’t have any canes sitting around so I had to make one. I explained that I don’t use canes the way most people do; I slice them up and combine different sections of the slices to make a nearly infinite number of unique kaleidoscopic designs. They agreed to that approach and suggested a color combination.
The cane I made looked like this. 
I made it rather quickly and there was quite a bit of distortion, but that didn’t matter with the technique I was using. I sliced the cane into very thin slices and started cutting and combining pieces of slices. These are some of the first designs I made.
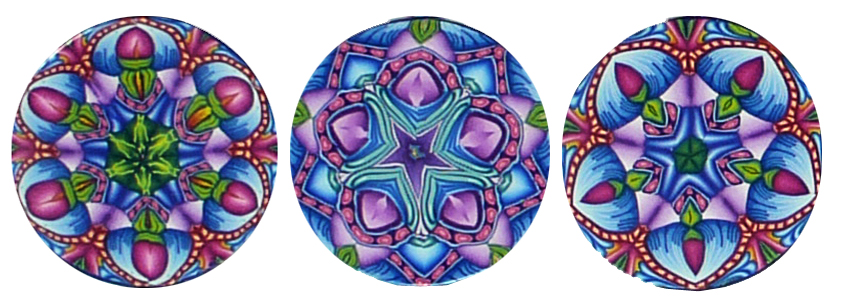
There is something zen like about cutting and combining pieces to make one kaleidoscopic design after another. With my approach, there is no stopping to think “have I already done that arrangement?” One set of designs leads seamlessly into the next:
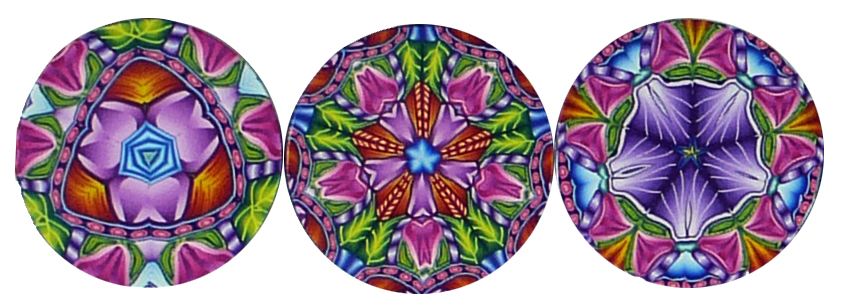
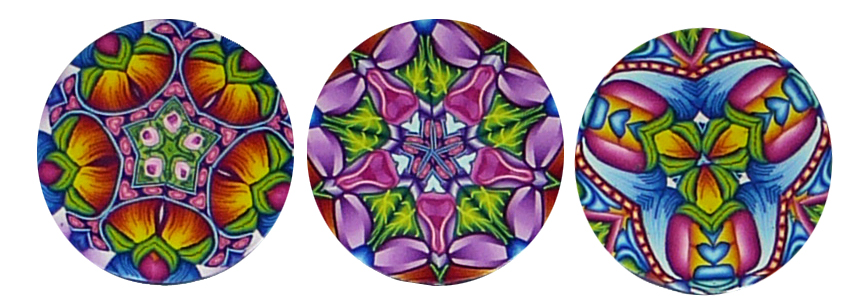
The designs above are from a different portion of the cane than the first three. A a result they have a different color emphasis. A third set of designs (below) includes some of the yellow and orange portions of the cane. (I’ll be teaching this technique in my 6-day Kaleidoscope Pendant workshop in Racine, WI next April. There are still two openings left.)
I didn’t want to just send the raw cane slices to be photographed so I applied them to a backing of scrap clay, trimmed the edges and put them in the oven. By the time I was done I had quite a few designs; each of them unique, like multicolored snowflakes.
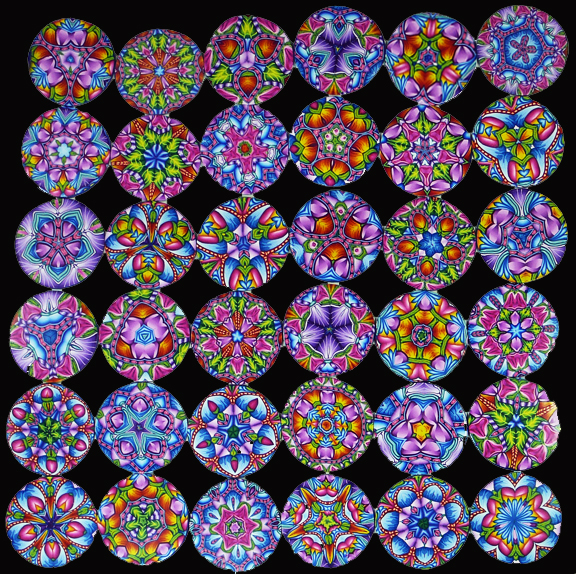
As the pieces came out of the oven I realized that they wouldn’t photograph well unless I sanded them. Typically my pieces are close to 1/2 inch thick and domed on both sides; I actually enjoy sanding them. Each of these disks was only about 3/16 inch thick , absolutely flat and nearly 2 inches in diameter. If you have tried sanding very thin, flat pieces, you know it doesn’t take long before your hand is cramping, your finger tips are bleeding and your nails are sanded down to the quick. I decided I needed some way other than my hands to grip the disks.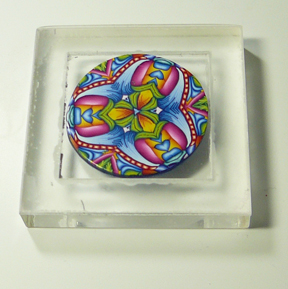
The solution turned out to be quite simple. I had my helpful plastics guy make me a disk holder by gluing a 1/8 inch thick piece of plastic with a 2 inch square opening on top of a 1/2 inch piece of solid plastic with the same outside dimensions. I could place the disk in the opening, flip the block over on a piece of sandpaper and and slide it back and forth to sand the disk. Because the disk was thicker than the 1/8 inch-thick frame, the top of the disk was quickly sanded into a flat, even, smooth surface.
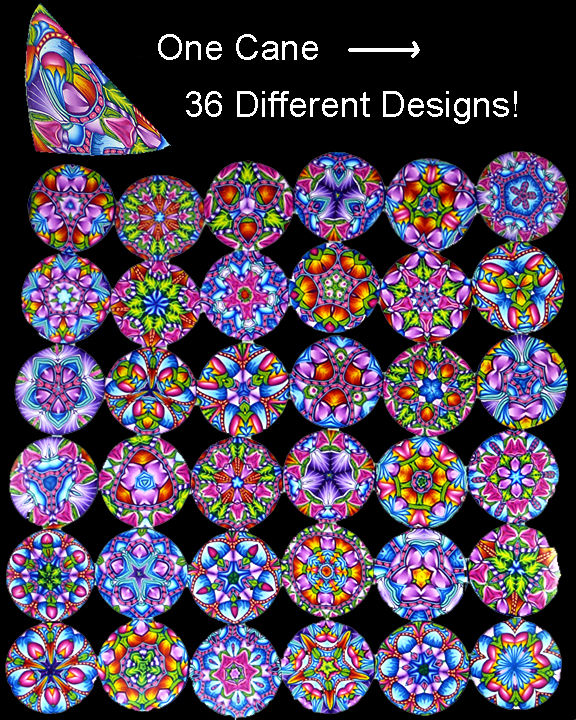
36 kaleidoscope designs from a single cane.
The display above is now a piece of wall art for my studio. I call it 36 Permutations.