
This post is intended to help people who would like to take my intermediate caning workshops but are unsure whether they have the necessary background.
The caning workshops I offer are described as appropriate for intermediate-to-advanced level caners. Many of you have asked me how you can decide whether you have reached that level. First of all, you should have already made a number of canes so that you understand the concept and have some experience manipulating clay into canes. It doesn’t matter how long you have been caning; if you can do everything on this page, you have the skills needed for my workshops. (Other teachers may have different expectations). If you aren’t already at this level, you can use the videos to help you develop the necessary skills. Once you are able to follow each tutorial with confidence, you are ready!
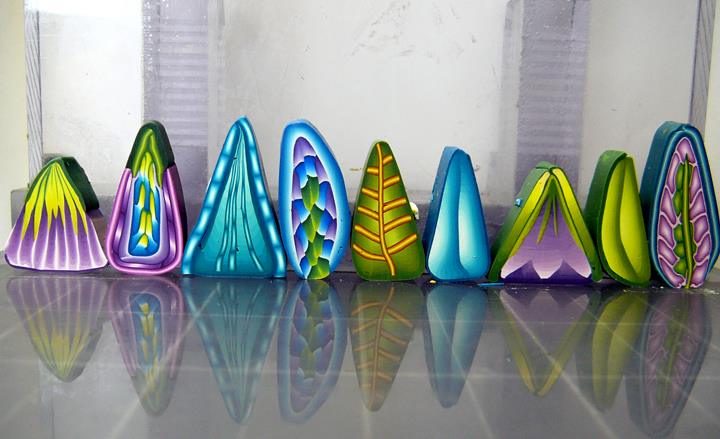
Some of my component canes (no video link)
To begin with, you should be able to roll out a large sheets of clay the full width of your pasta machine, with fairly even edges. In my workshops you will be creating complex canes; that is, canes comprised of smaller component canes. All but two of the above canes, as well as my kaleidoscope canes, are complex canes. The first 4 videos show how to make simple component canes. You should learn these techniques first. The last video shows how to turn two simple canes into a complex flower cane.
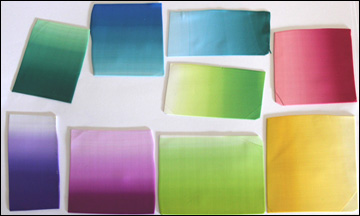
Some of my blends (no video link).
Nearly all of my canes begin with blended sheets of clay. These blends are often referred to as Skinner Blends because Judith Skinner developed the basic technique. Other artists have modified the technique to produce a wide range of results. These are some of my basic blends.
Click on the pictures below to follow the link to the related You-Tube video. I did not create the videos, rather, I am grateful to Yonat Descalu and Vale Sakura for their excellent work.
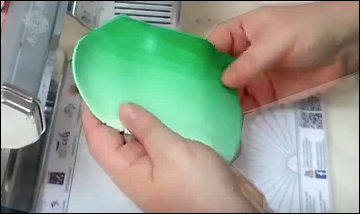
The video titled Polymer Clay Tutorial – How to Make a Blended Sheet – Lesson #1 by Yonat Descalu introduces the classical Skinner Blend. Notice that Yonat blocks off part of the opening of the pasta machine with a block of clay to make a narrow blend.
This blend will be the full width of the pasta machine (no video link).
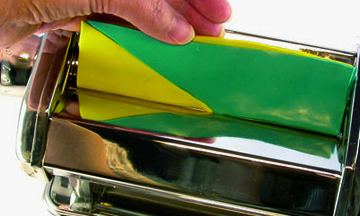
Most of the time I use the entire width of the pasta machine for my blends. I also use quite a bit of clay. Try making a blended sheet the full width of your pasta machine and about 5 inches (12.7 cm) long on the second-thickest setting of your pasta machine. Keep the sides of the sheet as even as possible. If you have a Dream Machine, make your blend 7 inches wide by 5 inches long.
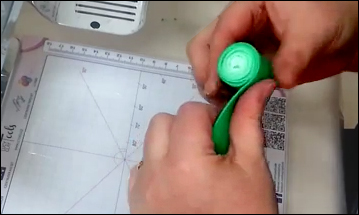
Polymer Clay Tutorial – How to Make a Blended Log – Lesson #2 by Yonat Descalu
This video, Polymer Clay Tutorial – How to Make a Blended Log – Lesson #2 by Yonat Descalu, shows how to fold, narrow and elongate the sheet and then roll it into a shaded log that is lighter towards the center. Many of my canes start with a log like this.
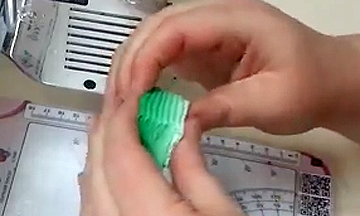
Polymer Clay Tutorial – How to Make a Blended Block – Lesson #3 by Yonat Descalu
This next video, Polymer Clay Tutorial – How to Make a Blended Block – Lesson #3, by Yonat Descalu, shows how to make a blended block, or stack. The technique begins the same way as the blended roll, by narrowing and elongating the blended sheet, but in the next step it is accordian-pleated to make a block instead of a roll. I probably use this technique more often than any other.
Practice the blended log and blended stack until you can do them easily.

Blended logs and stacks in my studio (no video link).
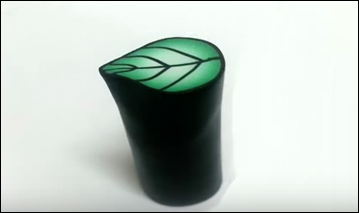
Polymer Clay Tutorial – How to Make a Leaf Cane – Lesson #13 by Yonat Descalu
This cane, shown in the video, Polymer Clay Tutorial – How to Make a Leaf Cane – Lesson #13, by Yonat Descalu begins with a shaded log. She cuts into the log to insert thin sheets of black clay for veins and wraps the cane with another thin sheet to create a narrow outline. I often insert clay into my canes or wrap them to create outlines. When you cut into the clay for veins, cut straight down perpendicular to the table rather than at a slant.
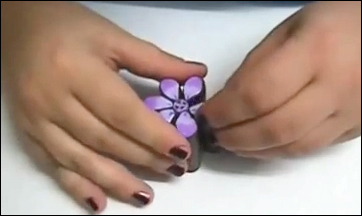
Polymer Clay Lilac Flower cane by Vale Sakura
This final video, Polymer Clay Lilac Flower, by Vale Sakura shows how to construct a complex cane from two simple canes (petal and center). Note how the outlines help set off the petals from the background. Then notice how she fills the gaps between the petals so the flower will retain its shape when the cane is reduced. Try making this cane.
Bring the canes you have made to the workshop.

I’m glad you like it. This is quite a different skill from making the standard jelly-roll, checkerboard, etc., canes.
Great addition to your blog. Having taken your workshop, I can attest that I would have been reassured that I could be successful if these benchmarks for skill level had been available. I also just love looking and drooling over the soft color palette of blends you show. Thanks
Thanks, Christine. I’m glad you think it will be helpful to others!
Carol, Your canes are an inspiration, as always. This article would have been very helpful in preparing me for your workshop. I would have been able to complete each task more efficiently. Although I must admit I would take the class all over again, unprepared as I was, because I learned so much from you the weekend of my classes. To see how you work and your perception of color and watching your technique first hand, was invaluable to me as a beginner. I hope I have the opportunity to take another class with you in the not too distant future.
Thank you for commenting, Donna. I don’t know why I didn’t think of this before. I guess I just assumed intermediate-advanced level caners would know these things. I hope to see you in another class in the future.
Excellent information on practicing for the class in September. Thank you all!
Thank you, Carol!! As a novice at building complex canes, and having NEVER built a kaleidoscope, with a desire to get into some black-and-white work, this information will be invaluable (especially the picture of various colored stacks and rolls in your studio) for helping me do prepwork! (Now, to get myself one of those mega-squashers for speedily conditioning blocks of clay! 🙂 )
You will be one of my my primary sources of information for geometric caning going forward; thank you SO MUCH for your years of work on this blog!!!
Tiffany
You are welcome, Tiffany.
Thank you!
It’s reassuring to me to see the photo “Blended logs and stacks in my studio” because I’ve often worried that my color palette is too limited. I’m reassured because I see that you, too, work primarily with “cool”colors (pink, purple, blue, green) (I’ve never been positive whether green is classified as “cool” or “warm,” but it’s my favorite color after pink, so I include it). I worried that “real” artists use all colors equally, but you’re up there above most of us “regular” fimoteux, and if you can work primarily with a “cool”palette, then it’s certainly okay if I do, too! Thanks for showing us what you work with; you’ve certainly made me feel better about my colors choices!
(My most favorite color combo, though, is orange and pink, followed by turquoise and green. I have no idea howmirangenslipped in there. ☺️)
*I meant “how orange slipped in there.” Autocorrect often hurts when it tries to help.
The orange makes the others “sing.”
Your work is fabulous. I am a huge lover of polymer. From 35 years as stoneware potter to the cleaner side of “clay” I have immersed myself in working with polymer. I’m not a fan of Facebook, is there some way I can SUBSCRIBE to a way of FOLLOWING your work and workshops. I’m hesitant of leaving your page, I am so taken by ur color work. YOLO. (You Only Live Once)
Barb, Thank you for the compliments! I’m close to retiring from teaching but I will be teaching two 6-day workshops year: the Master Cane Workshop May 3-9 in a retreat center outside Kansas City, and either the Master Cane Workshop OR Flowers and Totems in beautiful Westport, WA (by the ocean) June 21-26, 2020. Both workshops have a heavy emphasis on color. Watch my Workshop page for more information.