
Not long ago I posted a photo of some tiny bowls I had made for an upcoming swap on my Facebook page. I promised to post a description of how they were made here.
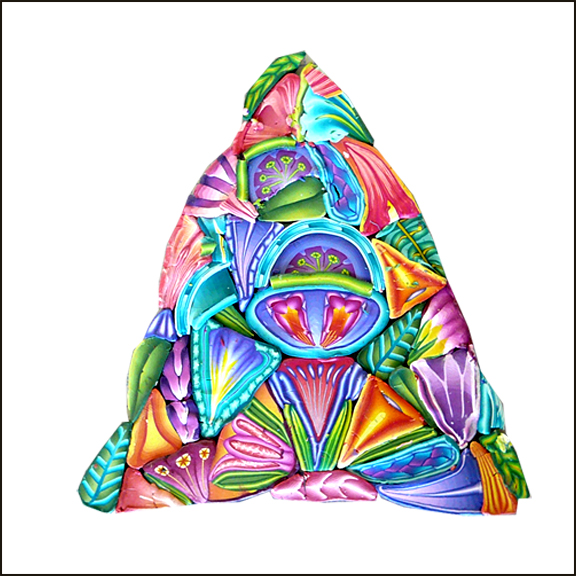
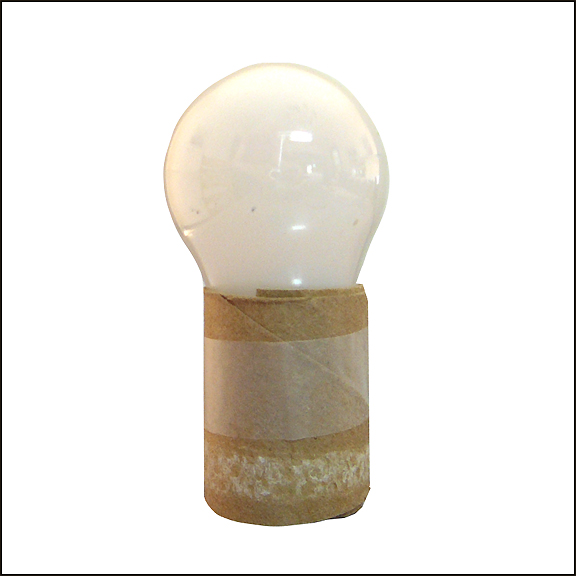
The only guideline we were given was to form the bowls over an #A15 appliance light bulb (about 2 inches in diameter) so they could be stacked one inside another. I decided I would use kaleidoscope designs, but I didn’t have a cane large enough to produce enough slices for all the bowls, so I had to start by making a Master Cane. I made a bunch of individual component canes, took slices off the tops, and put the slices together to make a “plan” for the master cane.
 After the Master Cane was built and reduced, I cut it into slices to use for the bowls. I tested different thicknesses of clay and settled on 3/32 inch (one and one-half revolutions of my slicer knob). At this thickness the bowls held their shape but still looked and felt delicate.
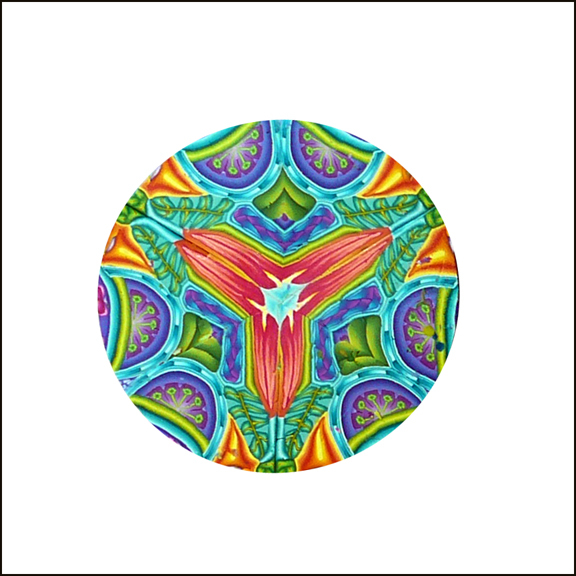
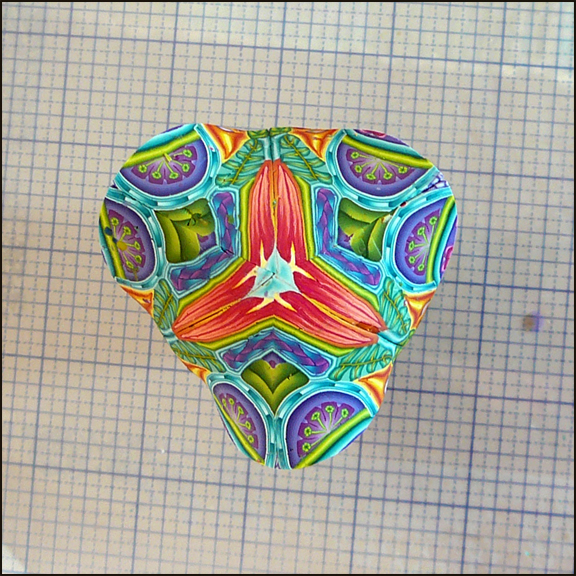
Next I made a series of one-of-a-kind kaleidoscope designs. They were 2 1/2 inches in diameter. Here is an example:
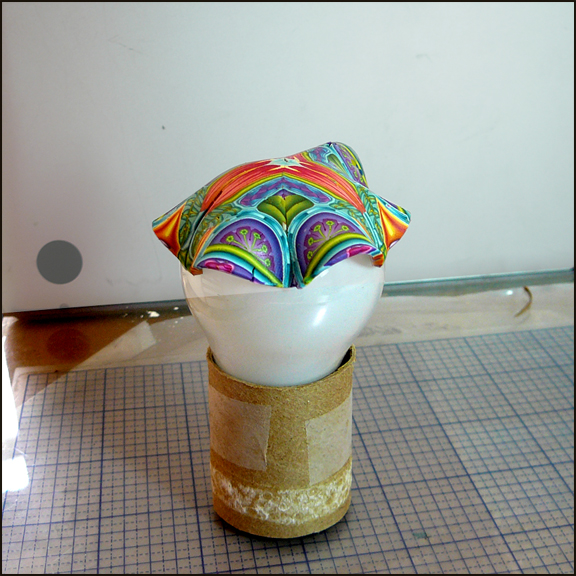
 I then made several cardboard sleeves to hold the light bulbs upright.
 After that I lifted each clay circle and positioned it so it was centered over the center of a light bulb.
 The next step was the trickiest part of the project. I had to mold the clay sheet to fit against the light bulb. Because the circumference of the clay circle was greater than the circumference of the light bulb I had to “shrink” the outer edges of the clay. That meant pressing the clay together bit by bit around the entire circumference of the light bulb. I began by “tacking” the clay down in three equally spaced locations to ensure that the design would be spread symmetrically around the light bulb.

I repeated this in three additional spots.
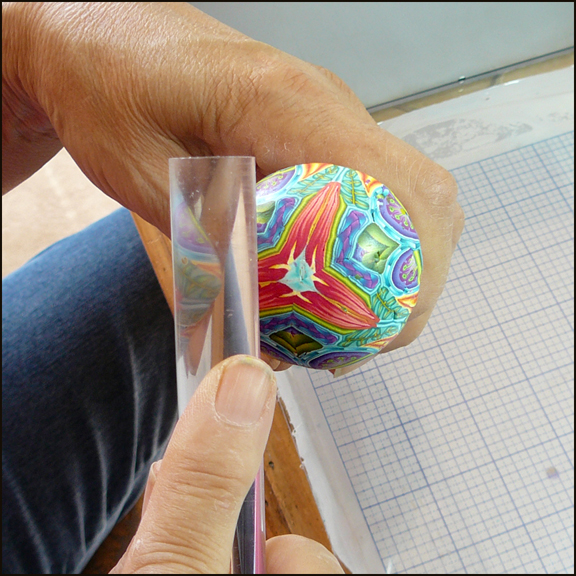
 Finally, I gently pushed the clay between the “tacked down” spots together until the clay followed the contours of the light bulb. Once the entire sheet of clay was pressed against the bulb I rolled an acrylic rod over the surface to fuse the joints and press out any air bubbles.
 The edges were a bit uneven when I was done, so I trimmed off small bits with a blade until they were straight. The last step was to press the bottom of the bowl against my work surface to produce a flat base to keep the bowl level.
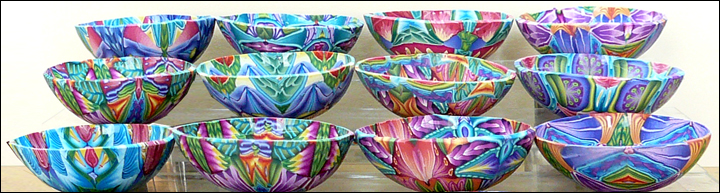
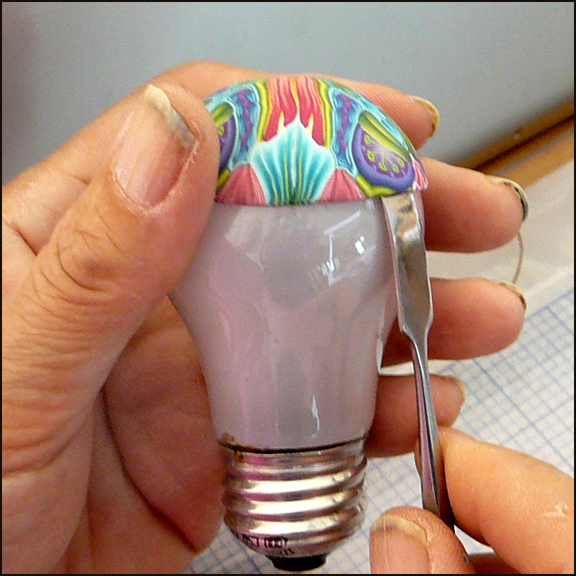
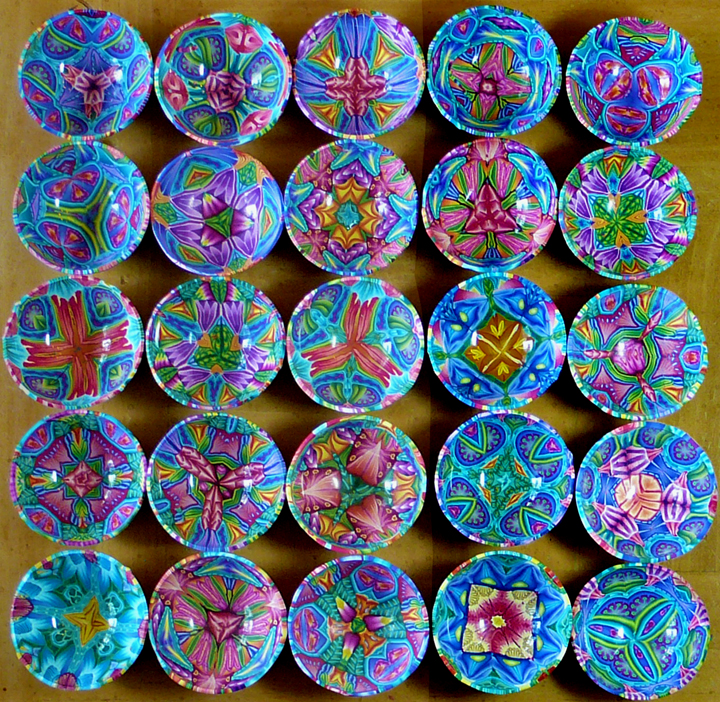
When several bowls were ready I baked them for about 40 minutes in my convection oven. After they had cooled down I carefully slipped a curved wax-carving spatula between the perimeter of the bowl and the bulb to loosen the bowl. Once loosened, the bowls popped right off. They are about 2 inches in diameter and 5/8 inch deep
The insides of the bowls picked up the glassy surface of the bulbs but the rims and outsides were a bit rough so I sanded them until they were smooth. Here are 25 of the 26 bowls.
What a fun project! If I were to do this again (without the constraints of the swap) I would use a larger bulb so the sides would flare out more to make it easier to see the complete design in the interior of the bowl.

Your canes are beautiful and so are your bowls!
Thank you!
These really are fantastic.
Oh, these are flat-out beautiful.
Love this, thanks for the tute.
You are welcome. Enjoy!
So generous of you to share…thanks bunches!
You are welcome.
Those are lovely bowls! Thanks so much for sharing your tips!
you are quite welcome Barbara.
Very nice project, Carol! Beautiful colours, as usual:)
Thank you!
Are you selling them? They are adorable.
Gail, I only made enough for the swap.
Pingback: Making miniature polymer clay bowls. | Linda's Art Spot
Carol, these are stunning and your canes are amazing.
Thank you, Lawrence. You should come to my caning workshop.
Carol, These mini bowls are simply gorgeous. The way you make colors sing is always so magical. Every pattern would make a beautiful pendant. Thank you, as always for sharing with us!
Thank you so much, Donna. It means a lot to me that you all take the time to comment.
Thank you for writing this tutorial and sharing it with PC lovers. Your kaleidoscope canes are always gorgeous!
Pingback: Tutorial: Tiny Bowls – Polymer Clay
Can someone explain to me the relationship between the master cane slices and the kaleidoscope circles? Sorry, I am new to polymer clay but am loving it!
This might help: http://carolsimmonsdesigns.com/2013/designs-like-multicolored-snowflakes/
Thank you! I get it now.
c’est vraiment superbe , j’adore ce kaléidoscope de couleurs.bravo et merci de nous partager votre tuto.
You are welcome!
did you baked with the bulb?
Yes.
Was the oven at 250? Were you nervous that the cardboard holder or the light bulb would burst? Cute tutorial. Very pretty bowls
The oven was at 265. It would have to be much hotter for those things to happen.
Beautiful work, patterns and colours are fantastic, I have a stack of Fimo but never get the time to sit down to it, busy with doll/materials. Having seen your work I am inspired to get it out. I would love to follow your work for inspiration in colours and patterns f that is okay.
I want to make fairies and fantasy
Your little bowls are so pretty. I love the colors too. Thanks for sharjng.
Did you bake the clay on the light bulb? I’m new at using polymer clay. I have made a few bowls with my grand daughter using pyrex mixing bowls. Your bowls are just beautiful.
Yes. You have to loosen them carefully after they are cool.
These are so very beautiful! I’m new at this clay thing and
I also wondered if it’s possible to put the “bulb”? “Lamp” inside the oven!? I probably will set all the neighborhood on fire but I must must try to make something similar if I can! Thanks for sharing these inspiring and incredibly wonderful thingys
/ Mia
Yes. They are fine in oven.
Your bowls are delightful…thank you for sharing…
Thank you and you’re welcome Judy.
I like craft but Your is gorgeous .
Thank you Carol for the tutorial!!
The colors you used made each cane harmonize.
This group of siblings that cannot be mistaken as to who the originator is.
Bravo!!!
The little bowls are so gorgeous. I would like to know if they are food safe.
Unfortunately,they aren’t.
Absolutely gorgeous! You are a genius! I’m just starting to experiment with polymer clay and am excited to try this. Thanks!
Fantastic work, thanks for the idea of pinning down in three places first, as my pattern goes all over the place when I just press down.
I’m glad that worked out for you Julie!
Did you bake these after molding them, etc.?
yes
Carol, thanks for this little tutorial. You are a generous and talented woman, and I appreciate you!
Joey
Thank you! Miss you.
These are just gorgeous! With the bulb in the oven, did you lay the bulb on it’s side? Assuming the cardboard stand wasn’t also in the oven, but maybe it was? Thanks in advance. I can’t wait to try it!
Thank you Maggie! The cardboard does go in the oven. The temperature (275 F) is way too low to burn paper or cardboard.
This is so neat! How long did you heat the clay + lightbulb in the oven? More importantly, did you remove the metal piece and filament before placing the lightbulb in the oven?
Thanks!
I like your work, excellent. Please advise if it is dangerous to use the oven for polymar and for cooking too???
If you bake your clay frequently, you should do it in a different oven if possible. Oil from the clay builds up on the inside of the oven. It is messy and unhealthy. If you must use your oven, put your clay in a pan with a tent of aluminum foil over itso no fumes get out.
quel bonheur pour la debutante que je suis de voir cela ,j’ai hate d’essayer un jour quand j’aurai plus de technique,merci beaucoup pour tout !!!!
I love your bowls . You Put the bulbs in the oven ? I am principiant un this art. Thanks
munozlula@gmail.com
Yes – in the oven.
Hi Carol, I’m new to polymer clay work and just came across your page.
Just wanted to say how beautiful your work is. I bought the clay and couldn’t
decide what to try. Now I do. 🙂
Hi Carol, I’m new to polymer clay work and just came across your page.
Just wanted to say how beautiful your work is. I bought the clay and couldn’t
decide what to try. The bowls are so lovely
Thank you!
These tiny little bowls are so freaking adorable, I can hardly stand it! ⭐️❤️
Thank you!