
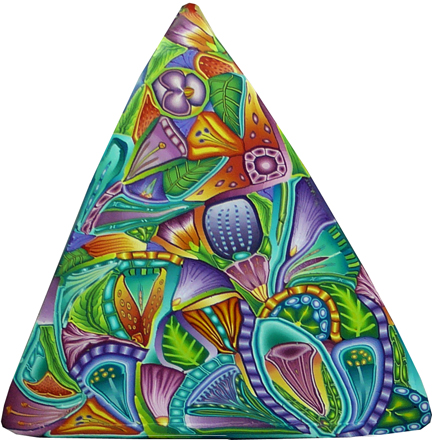
 Here is the master cane after all the components have been added and the cane has been compacted but not reduced. You are looking at a 1/4th inch thick slice I took off the back of the cane with my slicer. The slice is 5 inches from the tip of the triangle to the base.
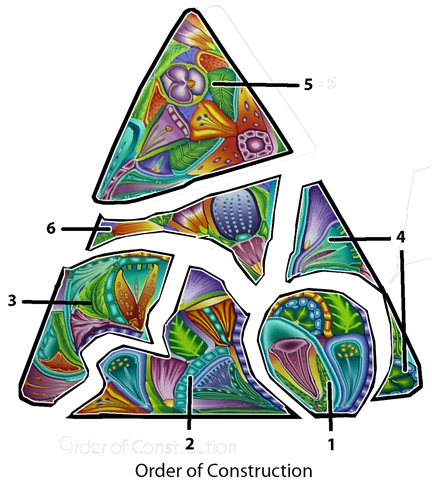
In this post I’m going to talk about adding the remaining four sections. I won’t discuss all the components this time, but I will point out some of the decisions (and mistakes) I made as the cane progressed. The sections of the cane and the order in which I added them are shown below.
As I worked I focused on providing visual separation between the components by
- Putting lighter canes next to darker canes and vice versa.
- Putting simple, plain canes next to more visually complex canes.
- Using neighboring canes of different hues
- Using a variety of cane shapes
- Using “line” canes or thin slices off of shaded blocks between components that were too similar visually.
I also aimed for a feeling of motion, energy, and fluidity.
I went through several iterations of section 3, primarily because of carelessness. I inadvertently allowed some components to touch one another before they were in the correct positions. Because the room was warm they stuck together and I had to pull or cut them apart. Some were so damaged I had to replace them with new components. Another difficulty was that I handled the piece so much that I distorted the profile on the right hand side where I planned to connect it to section 2. (After that I went home for the day – always a good strategy in such situations.)
I used a lot of “line” canes to separate elements from their neighbors in section 3. The most effective were the purple and white stripes and the pale blue “bricks”. The others weren’t as effective because they didn’t provide enough contrast. I also used some slices off of shaded blocks as fillers and dividers. If you look closely you can see a fuchsia one, a teal one and a green one.
As I constructed sections 3 and 4 I added the lower two corners of the triangle. I left section 6 for last because I thought it would be pretty complicated.
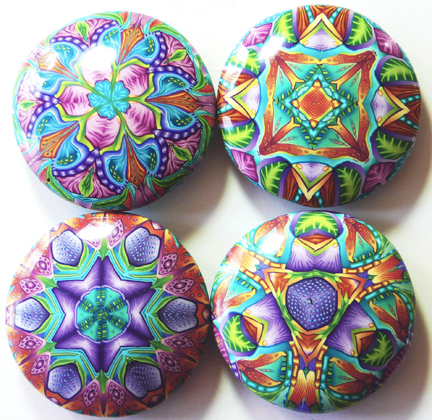 From the beginning I planned to have different colors predominate in different areas of the cane. Sections 1 and 4, combined, make a mostly blue-green-purple region. Section 3 is dominated by turquoise. I planned for section 5 to have red-orange, red-violet and green on one side and blue-greens and purples on the other. I did this knowing that when I cut up the cane and kaleidoscoped the sections I would end up with kaleidoscopes consisting of very different color combinations. On the right are some examples; there will be more in the next post (after I’ve sanded and buffed them).